
|
16. Tip: 240GD: The clutch: BM 46031017
last updated 2010, 04.01. (2005, 27.06.) Copyright Dr. Hans Hehl, translated by Klaus Hold ( www.gwagen.de) Impressum see TMG Paragraph 5 back to start - to index All work on the G requires special knowledge, competency, special tools and the strength to not overestimate your own abilities, or better go to the service dealer for repair or maintenance. This I did and used a mechanic service to replace gearbox and clutch. All information here at the best knowledge, but without guarantee! Data is for 240GD My 10/1979, BM 46031017000518 |
| Overview 1. test clutch clearance: 2. recieving cylinder overhaul: 3. transmitting cylinder overhaul: 4. clutch replacement: 5. clutch bearing: The clutch is operated with normal brake fluid DOT4. There is one hydraulic transmitting cylinder and one receiving cylinder. The brake fluid should be replaced every 2-3 years. 1. Checking clutch slack / clearance: The clutch clearance can not be detected from outside easily. Reason: The contact pressure increases with reduction of the clutch shoe (the clutch will not fade). |
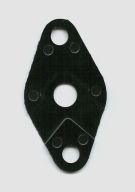
| The grid under the gauge is usable for a rebuild. The plastic base is available in two styles: A 4602511580 - 1,80 Euro incl. Tax and Nr. A 1152510080 - 1,11 Euro incl. Tax. |
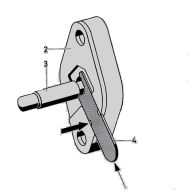
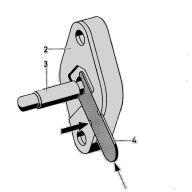
2. Clutch: slave cylinder / recieving cylinder repair:  back to the top back to the top a) Remove: After the fluid level in the reservoir has been reduced more and more the receiving cylinder needed to be repaired. First remove the fluid from the reservoir. Remove the filter by moving the filter to the side and turn it out. Put a hose on the bleeding nipple, open the nipple (7 mm hex tool) and remove the brake fluid. Remove the pipe at the receiving cylinder (12mm). Remove 2 screws that keep the cylinder in place (13mm). Attention: keep an eye on the plastic base between the gearbox and the cylinder. Remove the lock washer with a screwdriver and remove the stud with the grommet. In the cylinder the piston with the pressure spring is located. It can be removed with some knocking at the cylinder or with some air pressure. The sealing of the old piston was hardened. Remove the grommet from the pressure stud. b) Assembly: The inside wall of the cylinder must be fully smooth. Eventually remove the light rust with fine sandpaper (grain size 600). If rust rills exist, the cylinder has to be renewed. With some brake piston paste you can grease the cylinder a little bit and ease the assembly. The piston has been redesigned meanwhile. Insert the spring and then the pressure piston with the tip first into the cylinder. Put in the piston smoothly and constantly to not damage the rubber edge. On the new grommet insert the holding ring and then put it onto the pressure stud (see picture). Put the receiving cylinder into a bench vice, insert grommet with pressure stud and insert the tool washer (teeth pointing upwards) transversal on one side and insert it with a screw driver on the other side (secure it on all sides). The correct assembly is shown in the pictures below. Now the receiving cylinder can be mounted. The plastic base need to point toward the bell housing. Attach the pipe and refill the reservoir with new fluid. The bleeding is best with some air pressure (see tip: bleeding.) Step on the clutch pedal to help remove air. |
4. Replace clutch:
 back to the top back to the top
This report has been generated regarding a Gearbox change That's because old and new gearboxes are shown. |
 |
 |
 |
 |
 |
|
6. Part list:
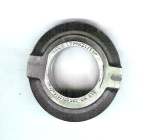
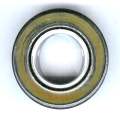
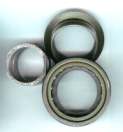
clutch disk: A 009 250 23 03 - 161,59 Euro incl. Tax pressure plate: A 003 250 91 04 80 - 111,36 Euro incl. Tax release bearing: A 000 250 51 15 - 39,67 Euro incl. Tax flywheel bearing: A 115 980 01 15 - 22,60 Euro incl. Tax cover: A 189 031 00 33 - 1,45 Euro incl. Tax |
 back to the top