



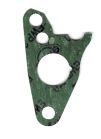
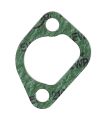



y-branch gasket
bottom new
Replacing the cylinder head gasket:

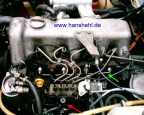
The replacement engine has had more then 200.000km on the clock, runs perfect, but on the left side, cooling fluid is leaking. In the front, oil is draining outside. Replace the gasket! It is interesting how an engine after 200.000 km looks like and if the 250 l rapeseed oil has left traces. |
 |
Get spare sparts

You need the following sealing and gaskets: 1. Cylinder head gasket: A 616 016 20 20 - 38,60 Euro incl. Tax Leave the gasket in the wrapping (Light and Ozone sensitive 2. y-branch gasket: A 615 142 05 80 - 8,35 Euro incl. Tax |
 |
|
|
3. Chain tensioner gasket: A 617 052 02 80 - 0,70 Euro inkl. Tax 4. Thermostat housing: A 616 203 02 80 - 0,64 Euro inkl. Tax 5. Eventual Valve head gasket: A 615 016 00 80 - 7,97 Euro inkl. Tax |
 |
 |
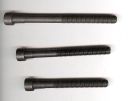
| Because the cylinder head screws had to be replaced (M12, Inside geared) if expended too much you should have 2-3 replacement screws of the 3 screw types available. Maybe they are enough, because not all of the screws are expanded equally. | |
Stretch measure (measured by head underside face to the screw end).
 8 long screws: A 615 990 02 12 - length: 144 mm, max. length: 145,0 mm - 3,03 Euro incl. Tax 6 middle screws: A 615 990 03 12 - length: 119 mm, max. length: 120,5 mm - 3,90 Euro incl. Tax 4 short screws: A 615 990 01 12 - length: 104 mm, max. length: 105,5 mm - 2,78 Euro incl. Tax |
 |
|
2. remove air filter, suction pipe, exhaust elbow, thermostat housing and the valve bonnet with throttle wire.
Unscrew first complete ait filter, then suction pipe with exhaust elbow (both screws in the exhaust flange). Both thick cooler tubes are unscrewed from the thermostat housing and the upper tube bell is completely screwed off the short connecting pieces. Then the thermostat case (two screws) can be removed. There follows the cylinder head bonnet. |
 |
3. Remove the injection rails and the main diesel filter.

Four injection rails are unscrewed, the leak oil pipes are drawn off from the injection nozzles and also the tube to the first injection nozzle. On loosening of both screws the diesel filter is moved a little bit away. |
|
4. Remove of the rocker arms with support blocks
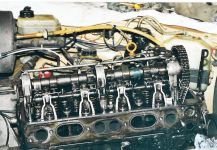
The camshaft is so put that the rocker arms are relieved. Attention: In addition not the camshaft is turned, only the crankshaft (27 nut, short lengthening and wrench) must be turned in rotation direction of the engine. Otherwise a danger for the tensioner blade exists. Both rocker arms group are removed (socket screws) and front and rear are marked for the correct reinstallation. |
 |
 |
5. Preparation: remove camshaft wheel

First the tension screw in the camshaft wheel is loosened (easily done, it is tightened only with 80 Nm / 8 kpm ), but not unscrewed. One can counterhold with a screwdriver by a hole of the wheel. |
|
6. remove camshaft
will be continued |
7. remove cylinder head

To avoid shape distortion of cylinder head, the screws must be released in the reverse order like the assmbly, thus also with the same working steps. The screws are tightened very hard. It is useful to work with a lenghtening (3/4"). |
8. remove cylinder head

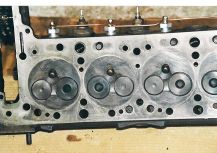
The cylinder head mostly sticks a bit, you can help a bit carefully with an iron-bar at the corners.If the gasket has freed itself, you can remove with an assistant the head and see hopefully nothing unusual. Engine mileage: 210,000 km exchange engines in 1984, since a half year 2300 l rapeseed oil with 2-3% of diesel). On the left in front the head gasket leaked water, you see the rust! |
 |
 |
| The white scab formations in the overhanging ball heads of the pre-chamber are normal after 200,000 km with diesel). |  |
|
9. Clean Cylinder head and Engine block
Now the rests of the destroyed gasket are removed with a sharply polished scraper carefully (create no grooves!). Beside that, you're your time and do not fill your oil channels with the gasket rests. I have cleaned the head with a wire brush. |
 |
 |
10. Muont cylinder head

The head will be put back, two studs on the engine block are ensuring correct postion. Fastening torque and angle (cold engine!): Attention: use an indicator (grease crayon) to indicate the screws that has been pre-tightened to avoid mistake. 1. Step: start at screw 1 to screw 18 with 40 Nm. 2. Step: use the same order for the 70 Nm. Pause 10 Minutes, because of the seating of the gasket. 3. Step: same order of screws, turn by 90 degree. 4. Step: same order of screws, turn again 90 degree 5. Step: tighten the M8-socket head screws (a) with the 6 mm tool. |
11. Chain tensioner check

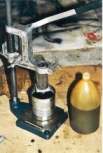
The chain tensioner should only be possible to be compressed with a lot of force. In the disassembled position oil was leaking and the tensioner was easy to be compressed. Then a 1 litre can is filled with 10series oil and with a drilling machine supporting stand or similiar tool oil is filles into the upside down laying tensioner. Compress and release (6 to 8 times) slowly to refill it with oil. Then the chain will not make noise when first start. Assemble the tensioner with a new gasket. A replacement is expensive (A6150500811): 171,56 Euro incl. Tax. |
 |
 |
12. First Start:

Install the rocker arms, adjust clearance of the valves. After everything is assembled correct, cooling fluid is refilled, it is getting exciting. First of all, the injection rails are connected to the injectors (only loosely). The leak oil pipes are connected, the last small cap is missing. Now pump with the hand pump diesel until diesel is getting out of the end of the leak pipes. If the diesel is getting outside, the injectors are filled with diesel and you don't need to crank a long time. |
|
13. Old piston from original-Engine 10/1979:
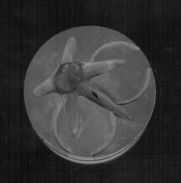
Interesting is the comparison of the pistons of the dissambled replacement engine with the defect piston of the original engine. The previous owner used to drive the 240GD mostly on the highway and perhaps has too many thermal incidents. The old piston had special slots within some cracks. |  |
 |
|
14. Other parts: see Filter 240GD
Diesel filter: A 001 092 04 01 - 10,07 Euro incl. Tax Pre-filter: Oil filter: A 617 180 00 09 - 11.95 Euro incl. Tax |
 |
 back to the top